Below is a step-by-step guide showing you exactly how to install a TJ Exclusives Aero base modification on a Logitech G Pro Superlight X2 DEX gaming mouse.
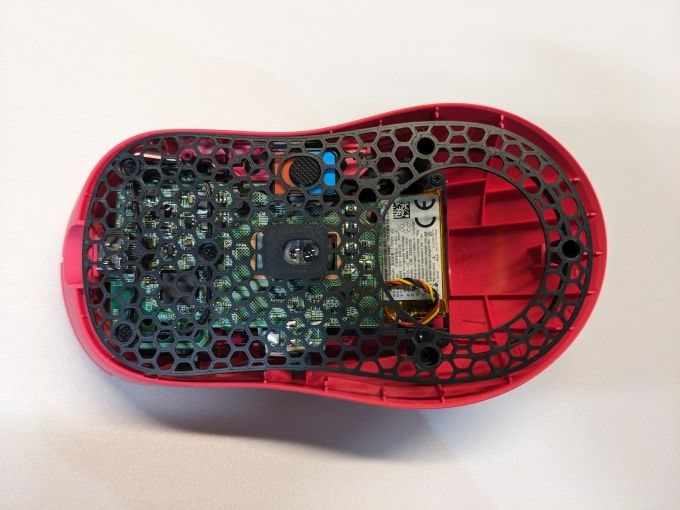
Tools Required:
– #00 philips screwdriver
– Small flat bladed screwdriver (optional)
Install Guide:
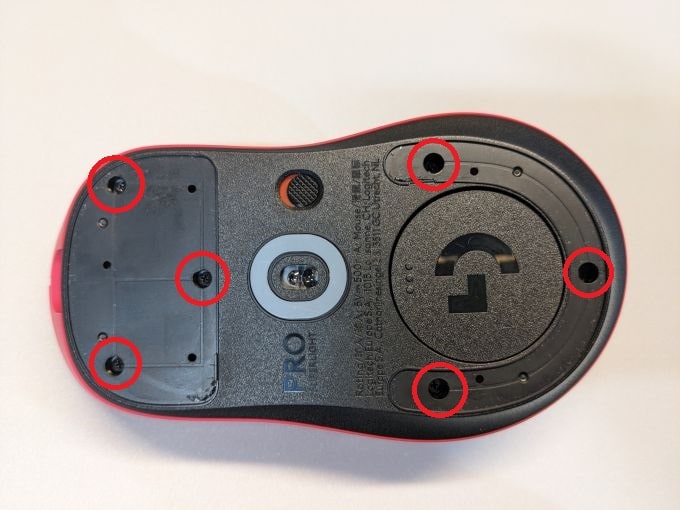
1) Remove the front and rear skate. Then remove the six screws with a #00 phillips screwdriver.
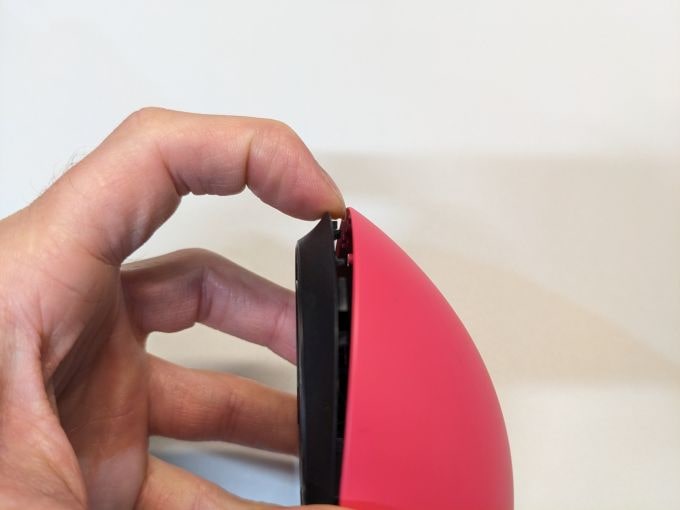
2) Grab the sides of the mouse and then squeeze the mouse to start separating the base from the top shell. Carefully pull on the back of the base to unclip it from the top shell. Do not pull it too far as there is a ribbon cable attached between the two pieces.
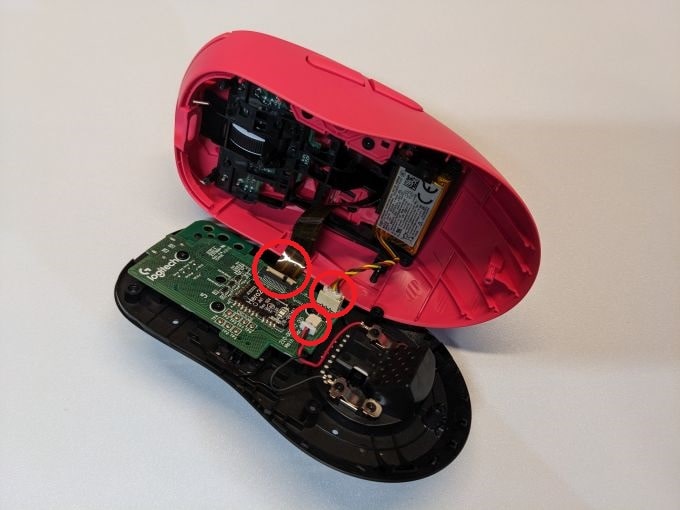
3) Pull up on the ribbon cable connector lock to release and then remove the ribbon cable from the pc board. Pull to unplug the battery connector and magnetic base charging leads.
4) Unscrew the three #00 phillips screws holding in the pc board. Remove the pc board and the power switch slider as it will be reused.
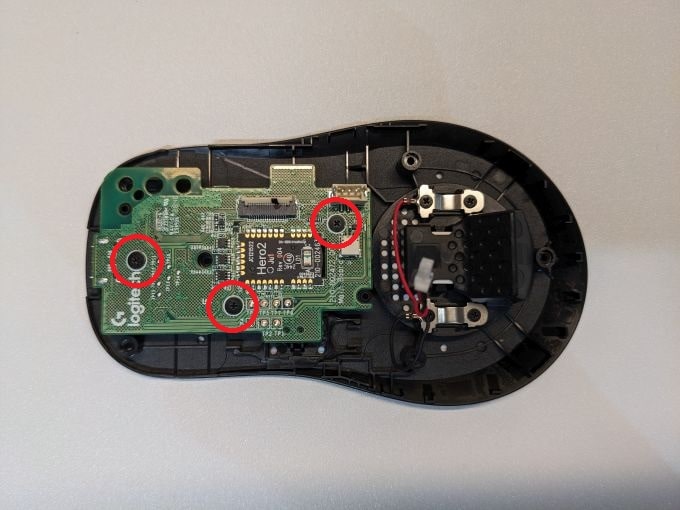
5) Place the power switch slider into the TJ Exclusives Aero base. The red side of the slider goes closer to the front of the mouse.
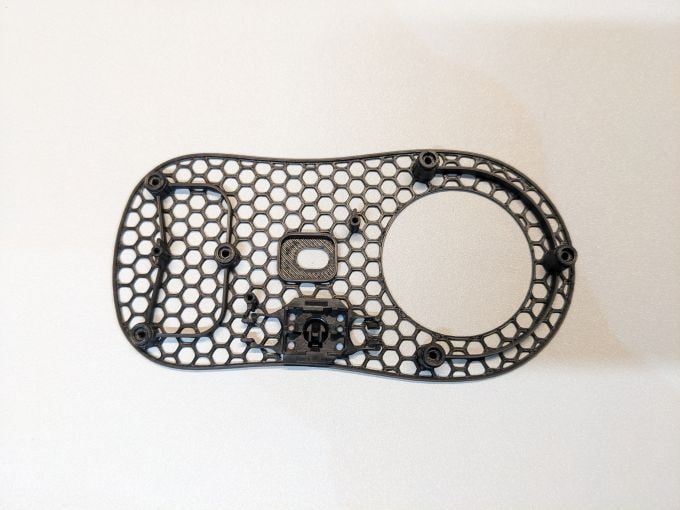
6) Place the pc board onto the Aero base. Screw in the three #00 phillips screws.
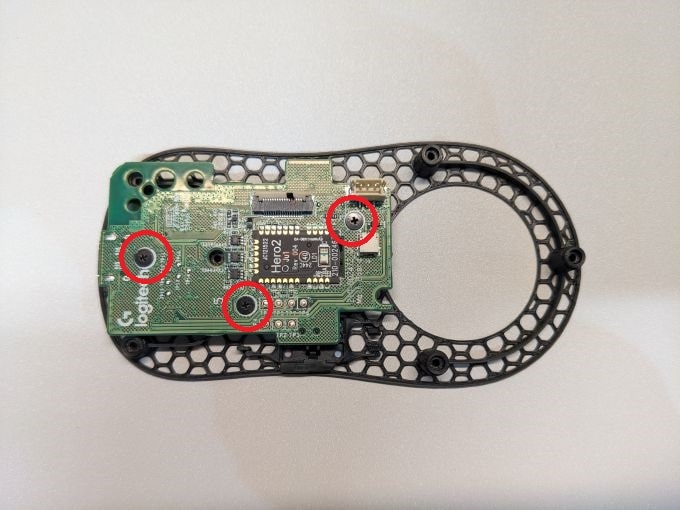
7) Lift up on the ribbon connector lock and then insert the ribbon from the top shell. Push the lock back down to lock the ribbon cable. Reinsert the battery connector.
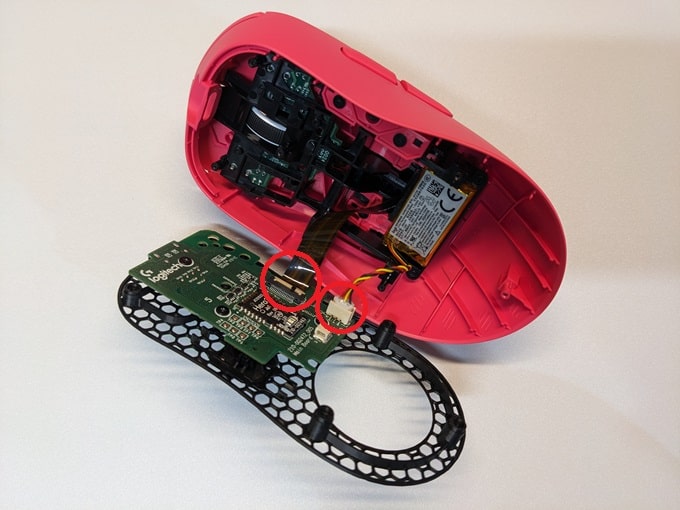
8) Close up the mouse and screw in the six #00 phillips screws to attach the base to the top shell.
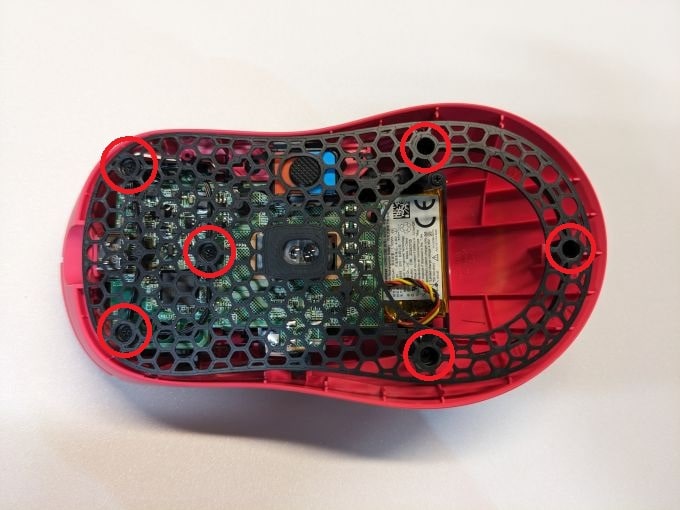
9) Stick on some new mouse skates. Position them in the same spot as they were on the original base.
Congratulations, your lightweight G Pro X Superlight 2 DEX is ready to use!


 No products in the cart.