Below is a step-by-step guide showing you exactly how to install a TJ Exclusives Aero base modification on an Endgame Gear OP1w 4k gaming mouse.
Tools Required:
– #00 philips screwdriver
– #1 philips screwdriver
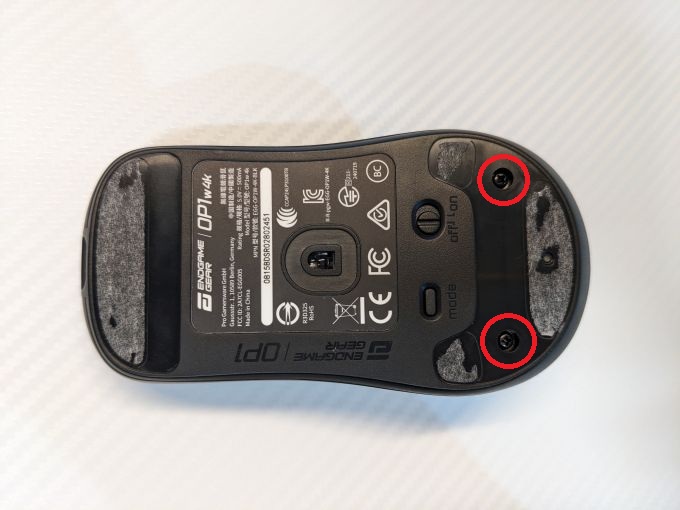
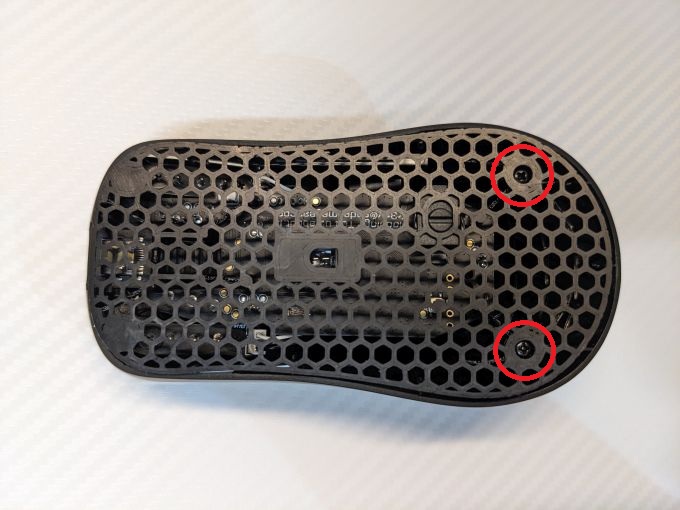
1) Remove the rear skate. Then, remove the two screws with a #1 philips screwdriver.
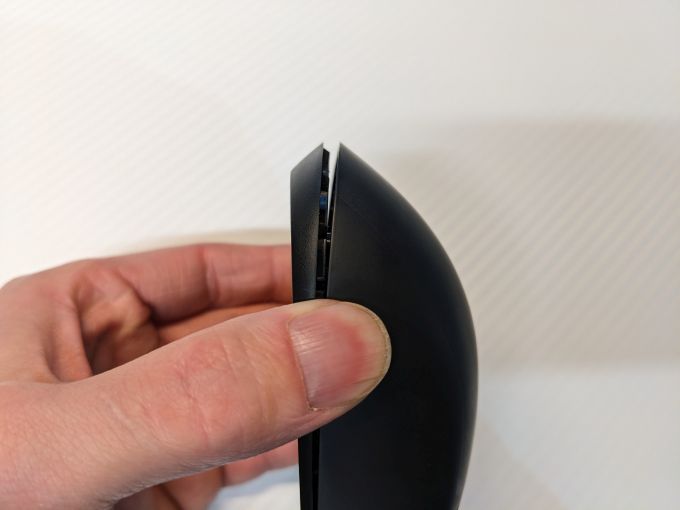
2) Grab the sides of the mouse and squeeze to start separating the base from the top shell. Carefully pull on the back of the base to unclip it from the top shell. Do not pull it too far as there are electrical cables attached between the two. Once the base is unclipped around the sides, pull the base towards the rear of the mouse to fully remove it.
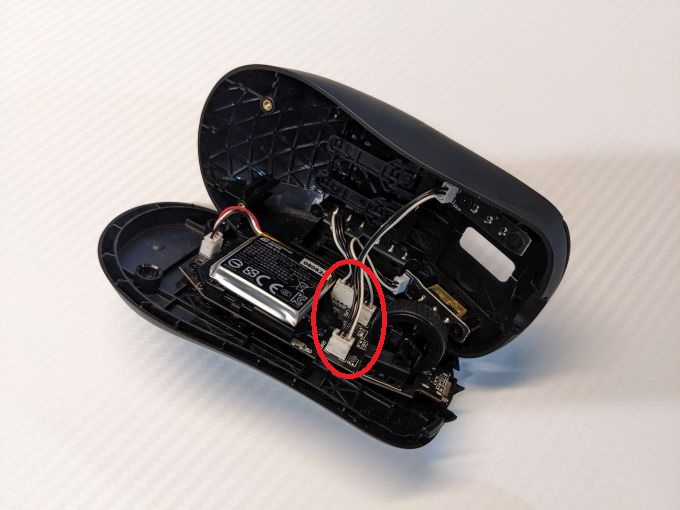
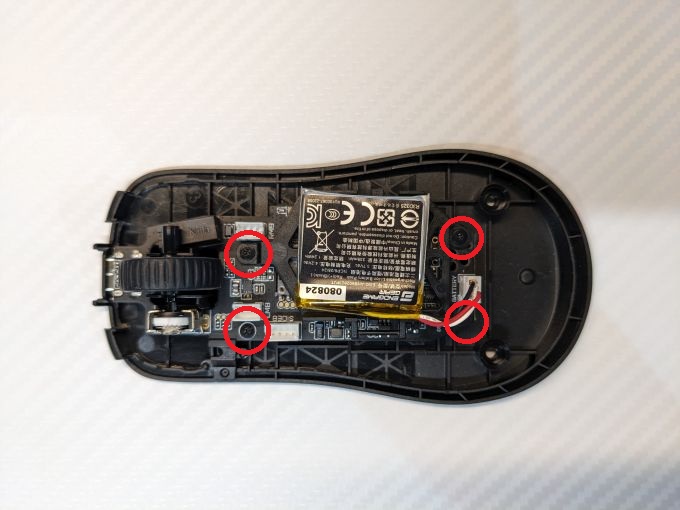
3) Remove the three connectors from the pc board. You just need to pull up to release them. Set the top shell to the side for now.
4) Remove the four screws holding the pc board and battery to the base with a 00 philips screwdriver.
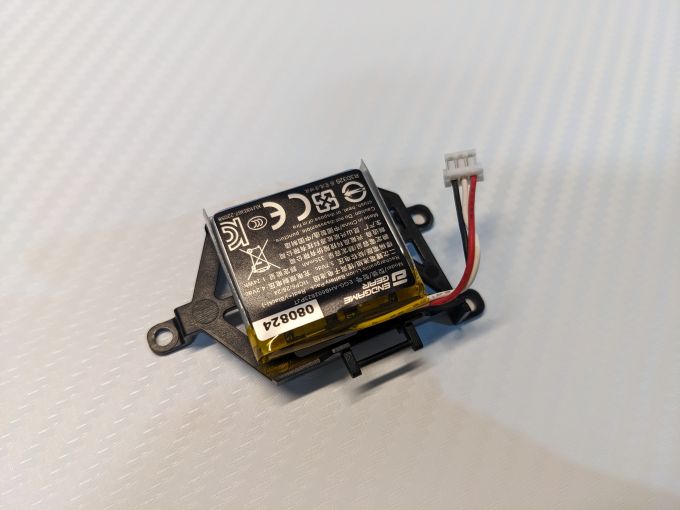
5) Optionally, remove the battery from the battery tray. This will remove an additional 1 gram from the mouse.
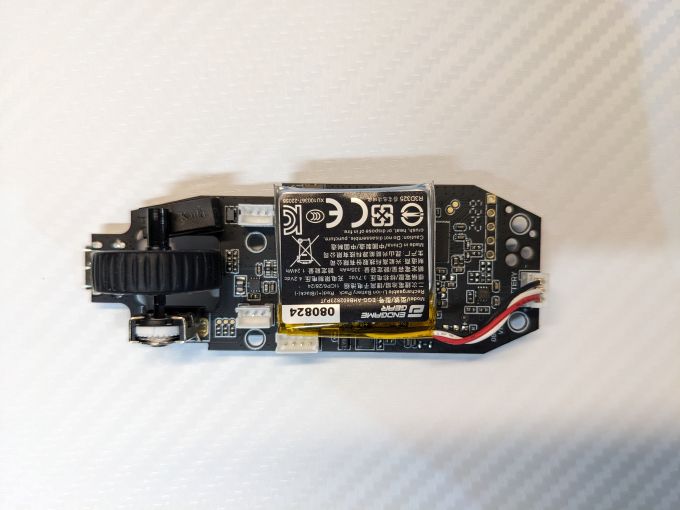
6) If you remove the battery from the tray, stick it down on top of the sensor as shown. When you press down to stick the battery, make sure to support the sensor from the bottom as it can bend the sensor legs.
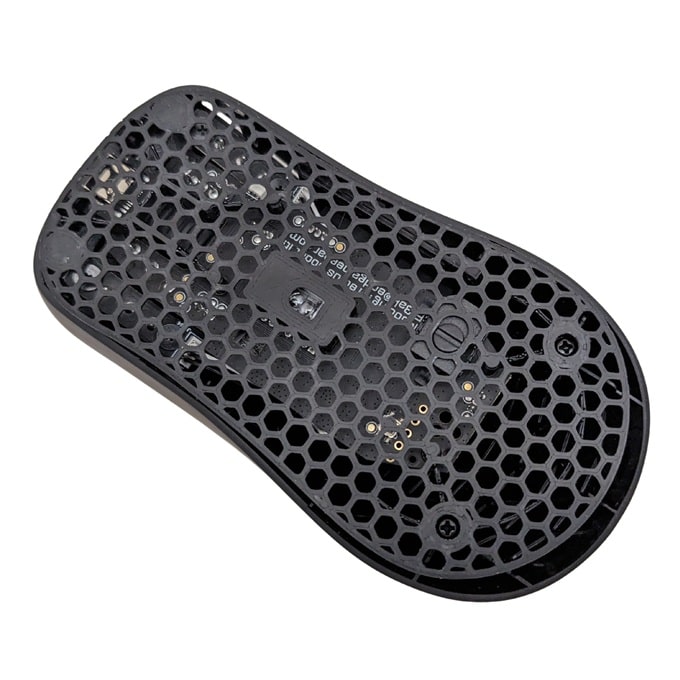
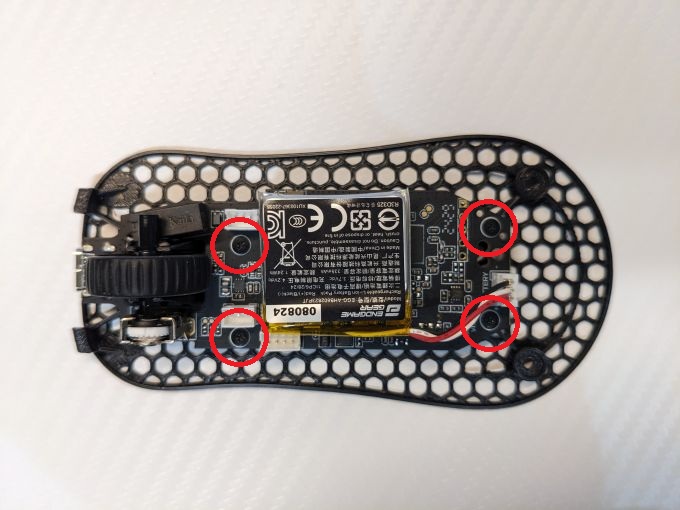
7) Place the pc board on the Aero base and then screw in the four 00 screws.
8) Reconnect the three wire connectors from the top shell to the pc board.

9) Insert the front of the Aero base into the top shell at an angle to engage the tabs that lock it in place. Then push the rear of the base down to align the rear screw holes. Reinstall the two #1 screws.
10) Stick on some new mouse skates. Position them in the same spot as they were on the original base.
Congratulations, you’re all done!
We recommend taking some time to test it out. Sometimes the lift off distance needs to be adjusted slightly.

 No products in the cart.