Below is a step-by-step guide showing you exactly how to install a TJ Exclusives Aero base modification on a Razer Deathadder V3 Hyperspeed gaming mouse.

Tools Required:
– #00 philips screwdriver
– T5 torx screwdriver
– Small flat bladed screwdriver (optional)
Install Guide:
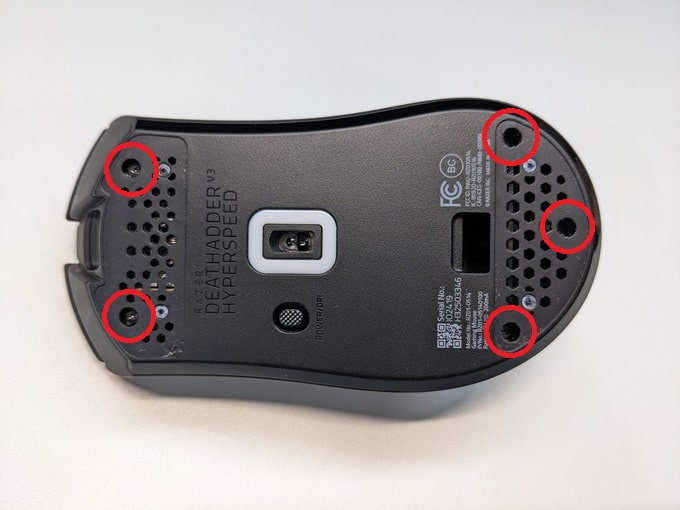
1) Remove the front and rear skate. Then remove the five screws with a T5 torx screwdriver.
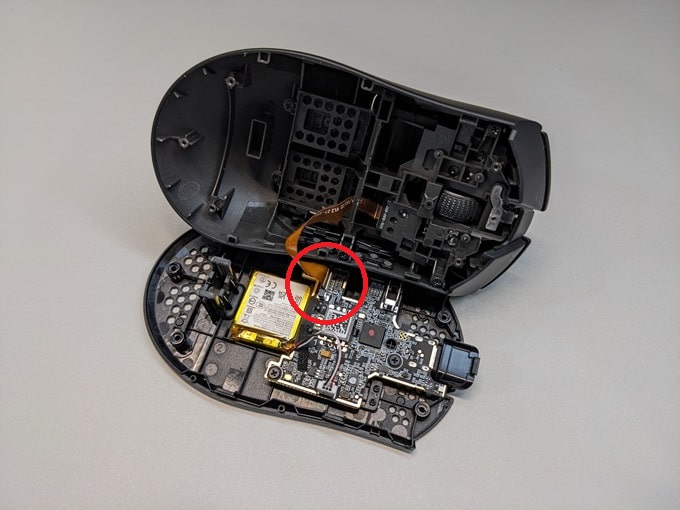
2) Grab the sides of the mouse and then squeeze the mouse to start separating the base from the top shell. Carefully pull on the back of the base to unclip it from the top shell. Do not pull it too far as there is a ribbon cable attached between the two pieces.

3) Pull up on the ribbon cable connector lock to release and then remove the ribbon cable from the pc board.
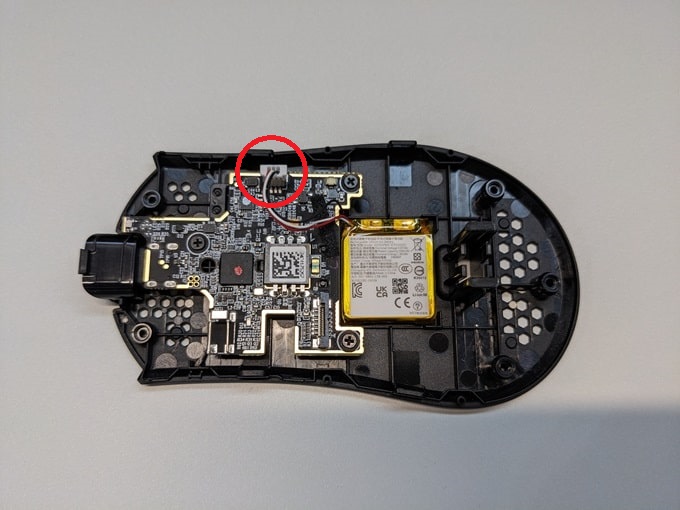
4) Disconnect the battery from the pc board and then remove the battery from the base.
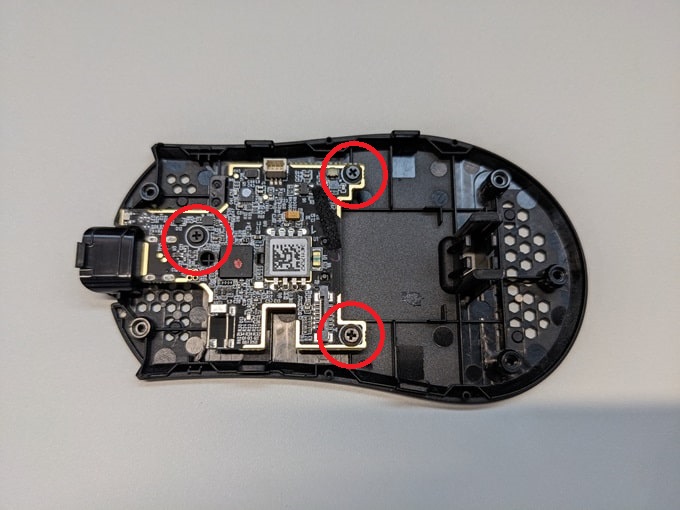
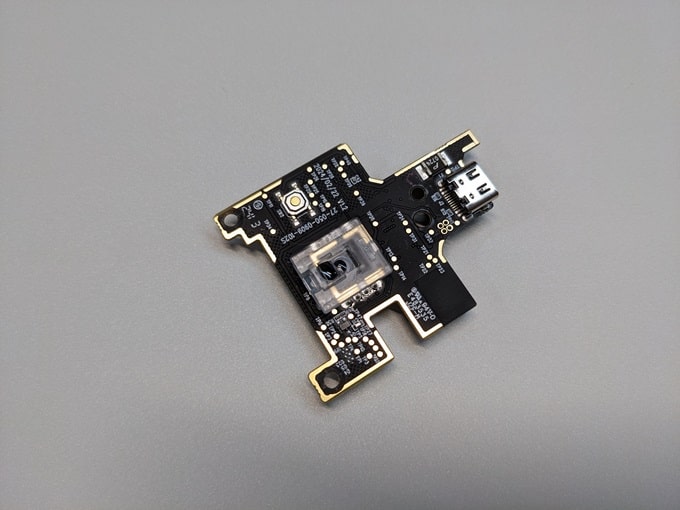
5) Remove the three screws holding the pc board to the base with a #00 philips screwdriver and then remove the pc board.
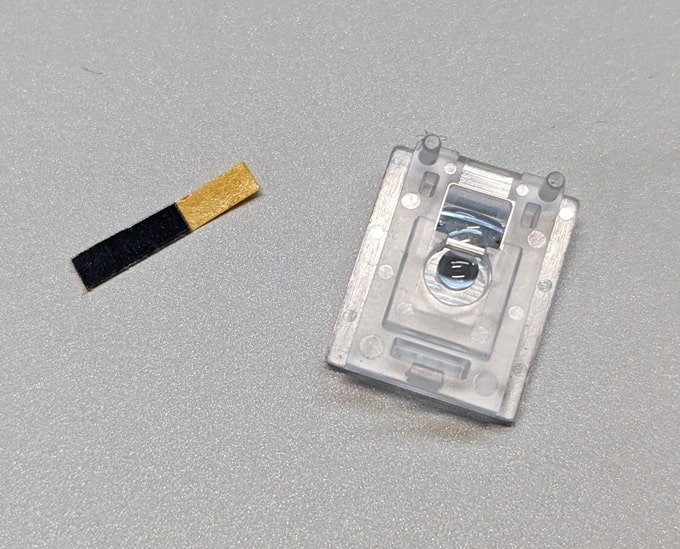
6) Remove the sensor lens from the original base. It can help to use a flat bladed screwdriver to pry it as shown. Be careful not to damage the clear parts of the lens.

7) Clean up any adhesive left on the lens and then apply the included double-sided tape to the lens as shown. It is easiest to peel the tan side of the adhesive first. Be careful not to cover up the clear section of the lens. The adhesive can hang off of the side of the portion you’re sticking it to.

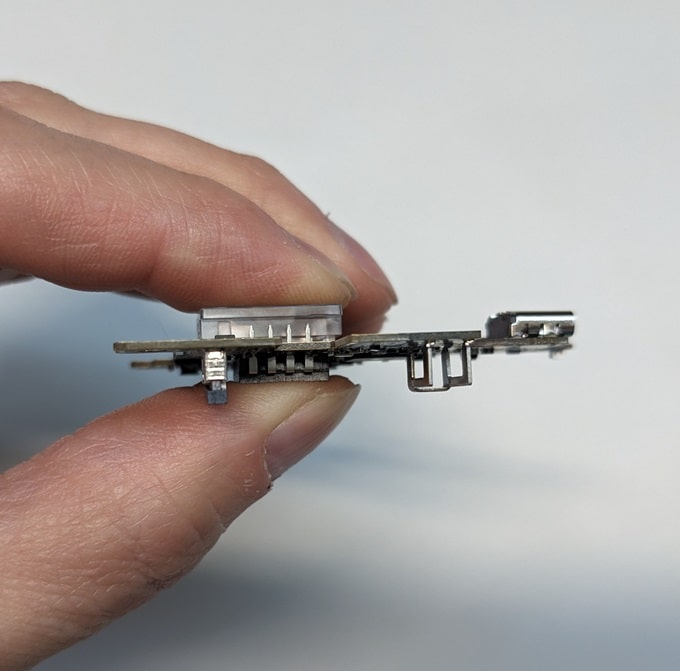
8) Stick the lens to the sensor. The pins on the lens line up with holes in the pc board to align the lens as you adhere it. Pinch the lens and the sensor for a few seconds as shown. Do not push on the lens and pc board as you can bend the sensor legs.
9) Install the Deathadder V3 pc board onto the TJ Exclusives lightweight base and then install the three screws with a #00 philips screwdriver.

10) Plug the battery in and then stick it down to the lightweight base. We recommend positioning the battery as far to the rear of the mouse as possible for best mouse balance.

11) Lift up on the ribbon connector lock and then insert the ribbon from the top shell. Push the lock back down to lock the ribbon cable.

12) Install the five T5 torx screws holding the base to the top shell.
13) Stick on some new mouse skates. Position them in the same spot as they were on the original base.
Congratulations, your lightweight Deathadder V3 Hyperspeed is ready to use!
We recommend taking some time to test it out. Sometimes the lift off distance may need to be slightly adjusted.


 No products in the cart.