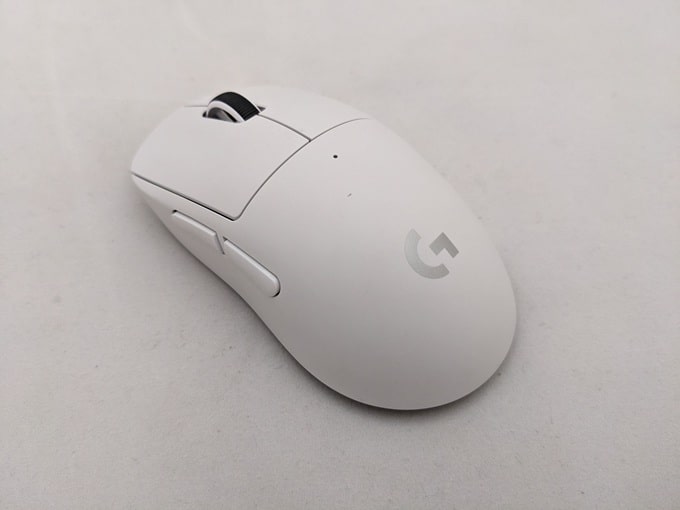
This is a step-by-step guide showing you exactly how to install a TJ Exclusives Aero base modification on a Logitech G Pro X Superlight 2C gaming mouse.
Tools Required:
– #00 philips screwdriver
Install Guide:
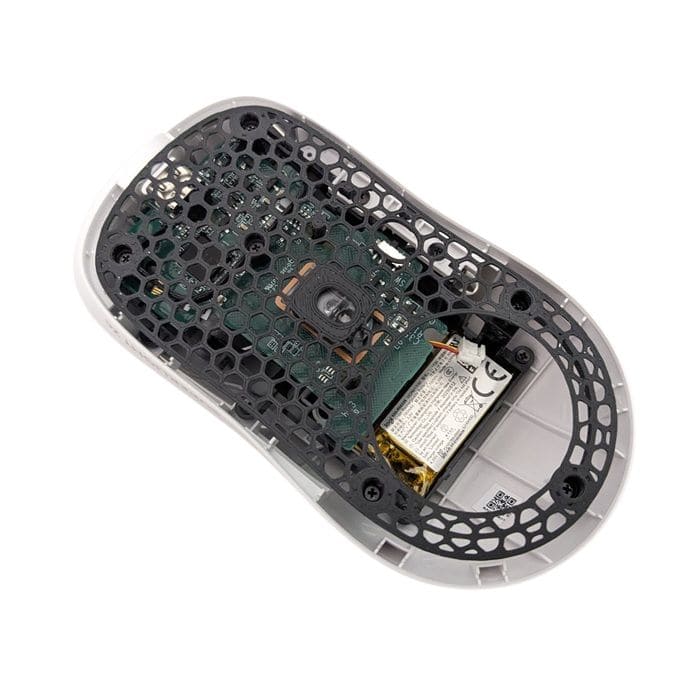
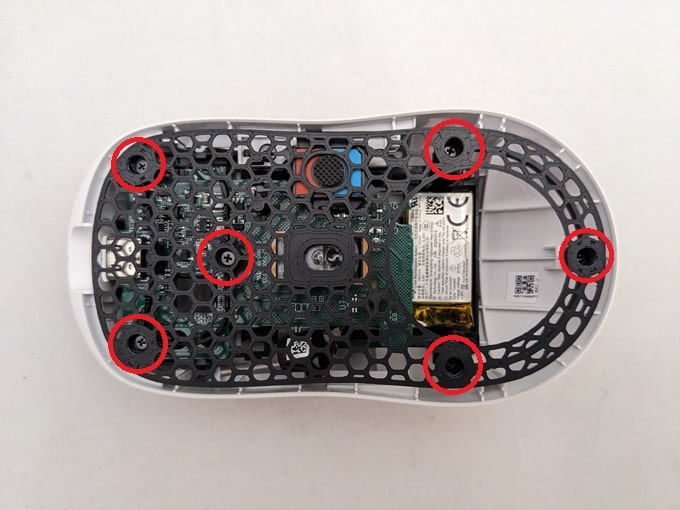
1) Remove the front and rear skates. Then remove the six screws with a #00 philips screwdriver.

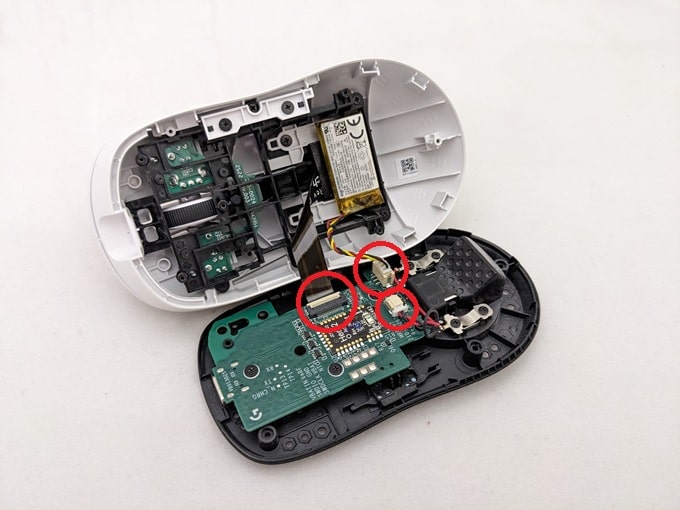
2) Carefully pull the top shell away from the base. Disconnect the circled electrical connectors. The flat ribbon cable requires a latch to be lifted up. The others are simply pulled out.
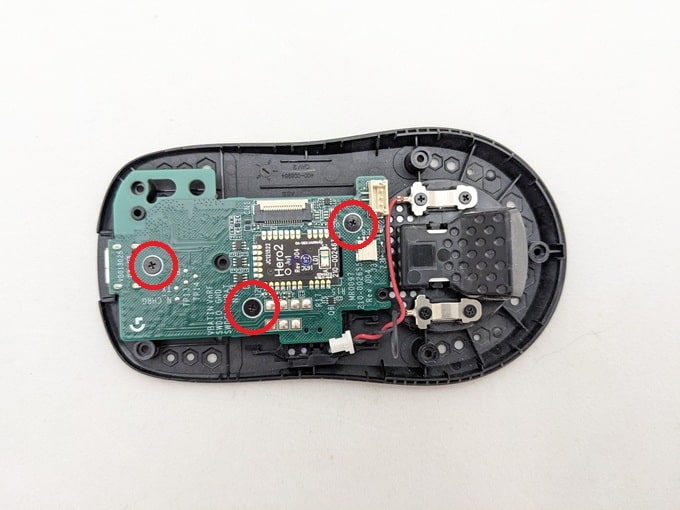
3) Remove the three #00 philips screws holding the main board to the base. Make sure to grab the power switch slider.
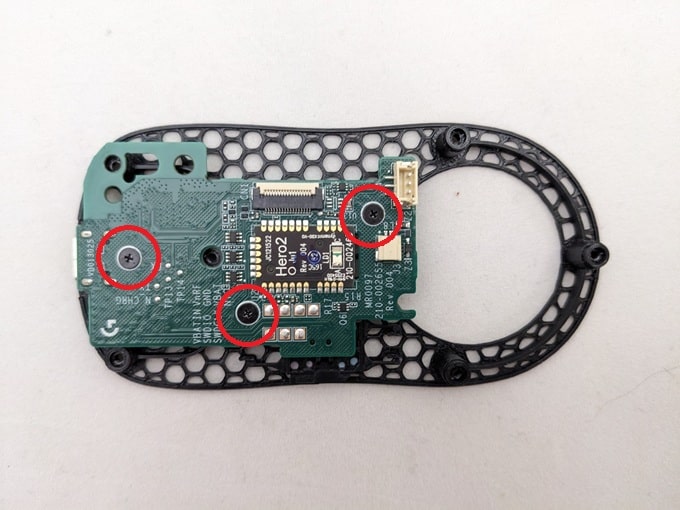
4) Reinstall the main board and switch slider on the aero base with the same #00 philips screws.
5) Grab the top shell and reconnect the two electrical connectors.

6) Reinstall the six #00 philps screws that attach the aero base to the top shell.
7) Stick on some new mouse skates. Position them in the same spot as they were on the original base.
Congratulations, your G Pro X Superlight 2C with Aero base is ready to use!

 No products in the cart.