This is a step-by-step guide showing you exactly how to install a TJ Exclusives Aero base modification on a Finalmouse Starlight-12 gaming mouse.

Tools Required:
– #0 philips screwdriver
– 1.3mm hex driver
– Hobby knife or similar knife
Install Guide:
1) Remove the rear skates. Then remove the two screws with a 1.3mm hex driver. Slide the base forward and pull it away from the shell.

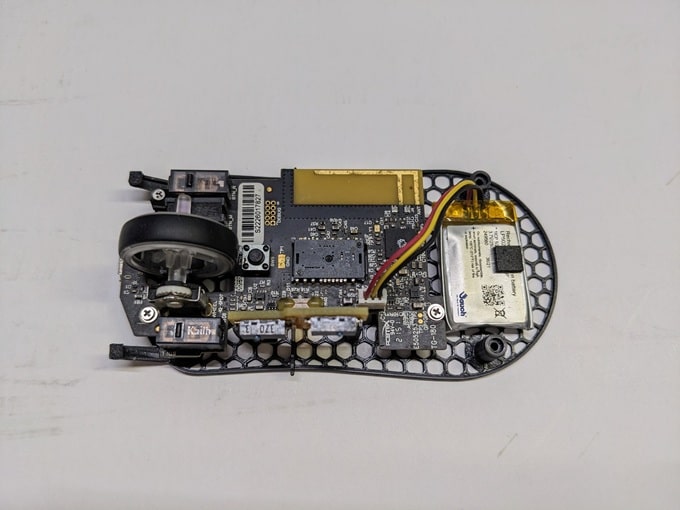
2) Pull up on the battery connector to remove it from the pc board. Pry up on the battery to remove it from the base. Be careful not to tear the foam double-sided tape or you will need to replace it.

3) Very carefully use a hobby knife or something similar to cut through the glue on the pc board. It is recommended to cut away from any pc board components whenever possible in case you do slip.

4) Remove the pc board from the original base. Install the pcb mounting bracket by pushing it on and into the corner shown.

Note the orientation. The chamfered edge goes up and toward the inside of the mouse.

5) Install the pc board onto the Starlight-12 Aero base. Screw in the three included screws with a #0 philips screwdriver. The screws going into the pc board get the washers.

6) Reinstall the battery and plug it back into the pc board.
7) Hook the front legs onto the top shell.

8) Pivot the back of the base toward the shell and install the two 1.3mm hex screws.

9) Stick on some new mouse skates. Position them in the same spot as they were on the original base.
Congratulations, your Starlight-12 with aero base is ready to use!


 No products in the cart.